Monday, 16 May 2016

CONSTRUCTION - 16.05.2016 PCI DONE

PCI!!!!!
We cannot believe that 1 year after putting the deposit down on the H&L package, we are so close to the finish line!

Although there are still a few things to be fixed up, for example our letter box, driveway and front yard, etc., we are very happy with how everything turned out (our colour choices which were made 10 months ago)

Our house looks so much better with painted pillars in windspray colour (matching the roof) than just surfmist.
before

after
 Front door - Hume NEX35 in Gemini Sliver colour and with translucent glasses. Tri-lock Angular satin chrome.

Wall colour - stonebridge, 90mm classic cornices (matt), architraves (gloss) in standard white.
Floor - Gerflor insight clic caldwell (very dusty, not yet cleaned)

Interior doors - Hume DEN
Walk in robe - melamine shelving

Shower - stainless steel frame (floor tiles are grey and wall tiles are white..)
 Vanity - 3 drawer banks
 Mirror - frameless
 Tapware - impression package
 Hand towel rings / double towel rail

since we used warm light, everything looks a bit yellow.

Kitchen splash back (detroit grey) had just been installed. It looked less green than I expected - thumbs up. All cabinets are inmatt white colour (hides the fingerprints and grease; no reflections). Our ceasarstone benchtop is 20mm white shimmer which has little bling bling effects, no waterfall. Taps (water and filtered water) and double bowl undermount sink are from impression upgrades.

Looking into dining room from the kitchen. We added an extra window at the back.

Living room

 I'll give more details in my next update, listing out all 'issues' and 'questions' we raised during PCI.

CONSTRUCTION - 16.04.2016 One month later..


One month later....

Other than the 2-week delay on the floorings, everything else was moving fast.
Driveway was ready to be poured and painting was done inside and out - kinda.. (they missed to paint the pillars)


We were only able to see inside through the windows. It looked like all tap wares, shelving and electrical were completed already.

Kitchen splash back (detroit grey) had just been installed. It looked less green than I expected - thumbs up. All cabinets are in matt white colour (hides the fingerprints and grease; no reflections). Our ceasarstone benchtop is 20mm white shimmer which has little bling bling effects, no waterfall. Taps (water and filtered water) and double bowl undermount sink are from impression upgrades.

Wall colour is stonebridge, I'll post clearer photos in the PCI update.


Friday, 18 March 2016

CONSTRUCTION - 18.03.2016 Tiling Check DONE

We are now moved on to STEP 5: LININGS, KITCHENS & TILING in MJH's 8 steps. (MJH - 8 steps), next step is PRACTICAL COMPLETION!

We had the second last inspection with our Site Supervisor (SS) on Friday, 18th Mar 2016. Waterproofing, internal doors, kitchen cabinets and bathroom vanities are all completed.

Our SS check the tiles with us, as well as how the tiles are going to be laid. Tiling commenced on the same day, and painting will start after Easter break.


Internal doors - Danish style (upgrade)


 -  Ensuite shower

- Vanity - 3 drawers (upgrade)

- Main bathroom


- Bathroom tiles ( wall - white, floor - grey)

- Kitchen (fridge cabinets, pantry, wall cabinets (lip, no handle), pot drawers, etc.

- Kitchen island

CONSTRUCTION - 11.03.2016 LOCK UP

Electrical and pipes went in after roof was done, which was a quick job.

Then it took around 2 weeks to put on the walls (and filling the gaps between the plasterboards, etc.), cornices, skirtings (for carpet) and architrave.

During which time, garage door and external doors were installed and internal doors were delivered.

On 11th March, we received the message from MJH saying it's now officially locked up. =]

- Garage door (single) is called Heritage short panels, surfmist colour


CONSTRUCTION - 21.02.2016 Electrical DONE

During electrical walk through, our Site Supervisor check every single item on the list with us. All electrical items (light, power points, phone line, etc) were marked on the floor.

It was a very short walk through.


Saturday, 13 February 2016

CONSTRUCTION - 08.02.2016 Roof DONE

Roof only took 2 days. This is how Austral Engage brick and Colourbond Windspray roof look like in the dark and in the sun.


CONSTRUCTION - 04.02.2016 Brickwork DONE

Brick is done. Only took 9 business days. It looks pretty straight from the sides. However, I did found the lines around the windows are not straight.

Need to organise an appointment to walk through and have a closer look at everything.

Roof started right away. When we visited the site on the weekend, sarking and fascia have been put on, half of the roof has been installed as well. Just waiting for eaves and the other half of the roof to be put on. Downpipes might be installed at the later stage.


Say 'hi' to my new neighbours :)

Saturday, 23 January 2016

CONSTRUCTION - 22.01.2016 Brickwork started


We only received the message from the site supervisor on Friday (22.01.2016) that brickwork has started.

However, look at that! We have half of the wall up on one side of the house already! Neighbours, watch out, we are catching up! :)


CONSTRUCTION - 16.01.2016 Windows DONE

We had an official inspection with the site supervisor the week before Christmas and were told our windows wouldn't be finished by the factory before the holiday. Then MJH was off for Christmas and back on 11.01.2016.

We go to the site every weekend to track the progress. Our windows have been installed and bricks have been delivered by Saturday, 16th Jan 2016.


Austral Brick Everydaylife Engage


Wednesday, 25 November 2015

CONSTRUCTION - 25.11.2015 Speak of the 'angels'

Speak of the 'angels' - they wasted no time!

Slab is done today!! Cannot believe how quick it is! Organised a family morning tea this weekend to see the site prep, now we have a little surprise for the family as well.

As one of the Home One neighbours mentioned, once the ball is rolling, it is fast!


Tuesday, 24 November 2015

CONSTRUCTION - 19.11.2015 Site Prep DONE

We got on construction list on Monday, 9th Nov. Grass were mowed on 11th Nov. MJH had 20 business days to start construction, but they wasted no time!

We were notified on Thursday, 19th Nov that site prep was completed. So we went out on the weekend to see how it is like without the grass, only expected a site cut.

But DUN DUUUUUUN! We almost have a slab! It's only Tuesday today, let's hope they are going to ask for $ this week to get the slab done!


Saturday, 14 November 2015

WE ARE ON THE CONSTRUCTION LIST!!!!!! - Last post for pre-construction

WE ARE ON THE CONSTRUCTION LIST!!!!!!  IT WILL START WITHIN 20 DAYS!

Finally!!!!

We had couple of delays with the approvals:
- council approval, because the officer was on annual leave.....
- construction certificate (by private certifier), due to incorrect council name mentioned on the paper work..

It took 8 weeks in total (including 1 week of developer approval). Due to this, we went over the 180 days tender period for several days. If there is only to do with MJH, no additional charge will be applied.

I have been updating my own excel log, recording all events and $ during the whole process. It helps me to track both my finace and the build.

I wiped the names and $ for confidentiality reasons, but below is how it looks like. Also, I created few tab for budgets - colour, electrical, furniture and appliances to be purchased. This helps me to work out how much $ we need to save up and to cut down the items which can wait.

Similarly, there is a separate log I created for finance. Comparison of different banks who offers different rates, charge different fees, etc. As well as a timeline same to below.


Last but not least, the grass (if any) on the land needs to be at ankle height. It doesn't need to be good look, but it needs to be short.

before

after


That's all we have for pre-construction. Let's get the construction started!

Electrical

Electrical appointment is the last appointment at MJH office. MJH advised to allow 2 hours for electrical appointment. However, if you are prepared, 1 hour is more than enough.

We received the appointment right after we signed the building contract back in July and the appointment was booked for early September (earliest appointment we can get.) We tried to re-schedule one month later, but we were told the next available appointment will be on 30th September...em.....We kept what we had.

We worked based on the up-to-date house plan we had drew out on pieces of paper at the beginning - lots of arguments between us.. duh``` Below are the final decisions we agreed on.


We did the entire electrical plan with MJH, well, except the pendant lights ($55 for pre wiring). We did it out of convenience and assurance.

Many people complained how expensive it is to get downlights through MJH. We did our calculations, too. To be honest, if you cannot get 'mate's rate', it may only save you $10 appx per light. Because there will be call-out fees, material costs,etc to be paid on top of the charge per light.
So, if you are not doing lots of them, I don't think it will save you much $, considering all the hassles you are going to meet. (purely personal opinion)

* There is one batten light in each room, including WIR, WIP, laundry, alfresco, garage and patio.
* The power points for microwave (in the island bench), dishwasher, range hood and fridge are included in our package.
* If you will like to change the batten lights ($55) to down lights ($95), you will only be paying the difference.  Dimming downlights are available. Downlights come in in many colours - for the colour of the light and cover.
* There is no free fan in the bathroom/toilet which has windows. You can add a fan ($145) on as a separate unit, or pay additional $15 to combine the light and fan into one unit. (If you are not adding heat lamps, no expensive 'rings' needs to be added)
* The alarm system is Bosch, 3 motion detectors and a battery box is included in the price.This is installed by a security company later on rather than MJH.
* If you have NBN access, you may not need TV antenna ($645), as people are saying you can watch TV with NBN access.
* NBN unit is installed in the garage, in other words, your internet point and phone point will be in the garage. So if you don't want to re-set your wifi router or make phone calls in the garage. It is worth spending $130 for a phone point and $130 for a data point in the living area. (Remember to check if there is power point for the phone!)
* Fluorescent light (double) can be very handy in the garage.
* No power point in the laundry! Must add 1 or 2!
* Cooker switch is available.
* You can decide the height and distance from the wall for the lights, switches and powerpoints
* Switches are  quite standard (white), but there are different colour options for extra $. We upgrade 2 switches (on the splashback) to grey colour, in order to match the splash back.
* It is a good idea to add 1 or 2 power points on the kitchen island. We added 1 on the side of the island. It can be done for waterfall bench top, but more expensive. Anyway, we paid $70 for the backing unit - safer.
* How many downlights you need? You need to consider the colour of your walls, how bright you want the place to be, if you'd like spot lights for your artworks. Google 'LED downlight calculator' for more ideas and tips.
* In our package, there is a double power point per room, excluding WIP, WIR, alfresco, hallway and laundry. We added one extra power point in the guest bedrooms as shown in the picture, so the bedhead doesn't have to be against the window side always.
* We added 2 outdoor powerpoint in the Alfresco, 1 at the joint of the glass doors at about 1 meter high (for plugging a fan in summer) and 1 just under the roof of the alfresco (for plugging fairy lights for Xmas or parties).
* Ceiling fans are quite expensive. We skipped the fan with light in the alfresco, since it will only be used several times a year for parties...if it's really hot, we would be inside with the air-con on =] However, we did add a fan with light in the master bedroom which cost us $435!! Similar item in Bunnings only cost $200 at the max. Well, at least proper wiring and switches are included.
* There might be additional charge in the end for the fuse box, depending on the total 'watts' of everything you have in the house.
* Think logically, and picture what you usually do in order in your future new house for what you want to be installed at where. For example, you just came back from grocery shopping, and parked your car in the garage at night. You would firstly turn on the light in the garage, then pick up everything to get into the house from the side door. (Therefore, a switch for the garage light and a switch for the hallway light are both needed next the internal garage door.) Then you walk to the kitchen, turn the kitchen light on and turn the hallway light off. (So your hallway light switch would be a three-way switch if you want to add another one at the front door, and the majority of switches would stay at kitchen/living - according to our floor plan).
Final plan made at MJH with additional Phone and Data points

Sunday, 13 September 2015

Colour Selection - Interior - Bedroom/Living Room/Dining Room


Finally, the room, where we spend most of the time in and cost the least.


* Floor covering
- Floor covering is included in our package (excluding Alfresco), which makes our live a lot easier. We have choices of tiles/carpet/plastic flooring. Future hubby and I are wooden floor fans,we love the texture, the look and the warm and earthy feeling it brings into the house. But the maintenance and cost can be a big headache. We thought about timber look tiles, but unfortunately they are not yet approved by MJH (for warrantee) and it's price is as high as porcelain. After a lot reaching, we found Gerflor. It has wooden texture, no glue, no grout, easy to maintain and quiet. It is easy to install as well, but still got charge $150 for installation even this is included in my package. =/

- Carpet was upgraded to a thicker and softer dark grey carpet which we paid the difference.

*Doors
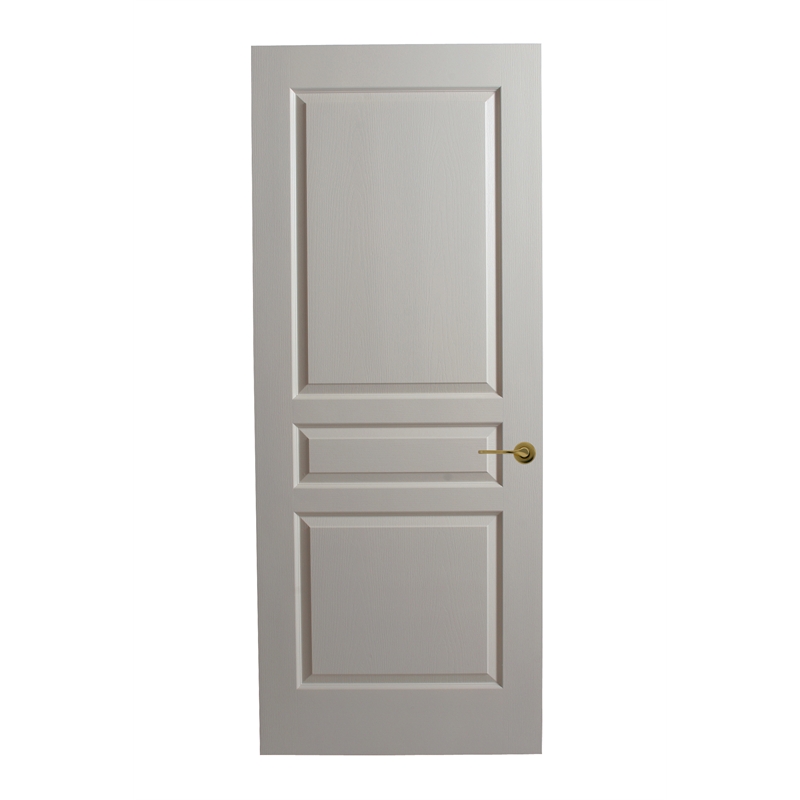
- THE most expensive item.. DOOR. upgrade is EXPENSIVE. It cost up $2,200 for all doors, including linen and pantry, $150 on average! Why it only cost $55 in bunnings?!

- Privacy locks for bathrooms and toilet for $40 each
- Door handles are updated to nicer looking Leverset, $400 package - one step up. 
- Key locks are like $140 each.


*Shelving
- $850 package price for upgrading to Melamine, including pantry and linen. but we still had to pay $130 on top of that for the weight supportings in the walk in robe,as we requested double hanging. =/ double hanging cannot be done in the wardrobe (not walk in) because they are not able to add supporting panel. Height of the hangings can be customised. 
-Customised drawer units for the walk in robe are a bit pricy. So we have the long side as double hanging, the short side as single hanging but we will place a tall chest of drawer (which we already have) there for extra storage.


Colour Selection - Interior - Kitchen


It has been a while since last update. I have been busy, and future hubby has been lazy..lolz
Our plan has been submitted to the council for a week now. We went through the electrical appointment a few days ago. And now all appointments are completed, just waiting for the council approval for construction.

Let's continue with internal colour selection, didn't upgrade much.


Kitchen can be another pricy room. The window splashback as shown below in the display home costs $2,000.00 and needs to be added in the first tender! That's a structural change and need to tell the salesperson to add this in at the very beginning.

It allows more light coming into the room and it just look awesome. It is non-openable, as no windows are allowed near gas stoves. However, I love cooking, the grease from cooking will damage the rubbers of the window/wall joints in the long run; and it needs a lot work to keep the window clean. 

MJH display home

*Benchtop
- We chose white shimmer Caesarstone, to give a bit shine in the open area and hopefully can hide some bread crumbs he leaves on the kitchen bench
- We chose SMEG build-in gas stove and oven. Although the build-in over is smaller than the free-standing, there will be no gap between the stove and the bench, meaning no food crumbs/grease and no cockroach. And there is an extra drawer for storage.
- Free standing stove has 2 styles. One is with leges, the other is with kickboard a the bottom to over the leges.
- 20mm stone benchtop thickness is standard and there is limited range of Caesarstone come in free of charge with the impression upgrade. Marble (engineered) benchtop costs $5K (not 100% sure)extra. 40mm cost $2.5K and waterfall is another $2.5K, as what I heard from other people (depending on the size of the bench, of course)
- I requested sink to be shifted to one side, so I can have more bench space to work on.
- We chose the most popular sink - Clark Monaco undermount double sink with accessory. This is the deepest sink in the impression upgrade and it comes with accessories (chopping board and basket drainer).


* Cupboards
- Default cupboards are in matte finish, gloss finishes cost extra, sorry didn't ask the price. And the wooden look finish goes horizontal, and vertical cost extra depending on length of the cupboards. We got white matte finish to match the white shimmer benchtop, and to make the area brighter.
- Soft close cost extra per drawer, all I remember now is 'it isn't cheap'. 
- Our kitchen bench has 3 cupboards on each side of the stove as standard. they can be upgraded to 2 pot drawers on each side. Each pot drawer costs $250. We only did 1 pot drawer on each side, no soft close (it takes extra space on the side of the drawers) and the consultant helped us to re-sized the pot drawers so we can fit in 2 skinnier cupboards (with doors) at the ends.
- There are 3 wall cupboards on each side of the rangehood as standard - with handles or with overhang lips (without handles), we chose the no handle option
- If you'd like LED lights underneath the wall cupboards, you'll need to upgrade the bottom of the cupboards to a thicker version $350 in total and another $75appx for each cupboard light. Emmmmm.... let's skip it..
- All cupboards can be re-allocated free of charge, which we did after rearranging the sink position.
- There are few choices for fridge overhead cupboards, as far as I remember, they are:
Regular cupboards (our choice)
Half cupboard and half wine rack
Full wine rack 
- For people who has a big island bench like below, please note the cupboards on the chair side are not standard.
- BTW build-in rubbish bin cupboard is available for $500 appx. Yes, $500, I'm not adding extra zeros. I'll pay $5 to add some quality hooks in the sink cupbard, Yes, $5, I'm not missing any zero.


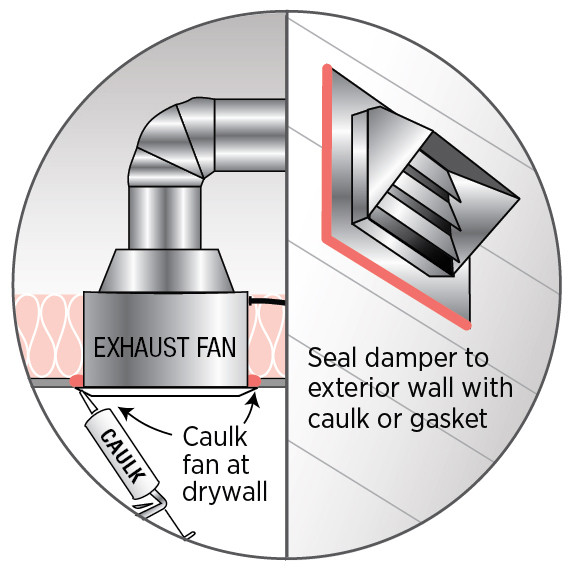
*Ducted exhaust
Last upgrade item we have on the list, expensive but necessary for me. I love cooking, but hate the grease smell on clothes or furniture, $790 is worth spending. The outlet is on the back of the kitchen, and it looks something like below, if I understood the consultant correctly.

*Kitchen splashback
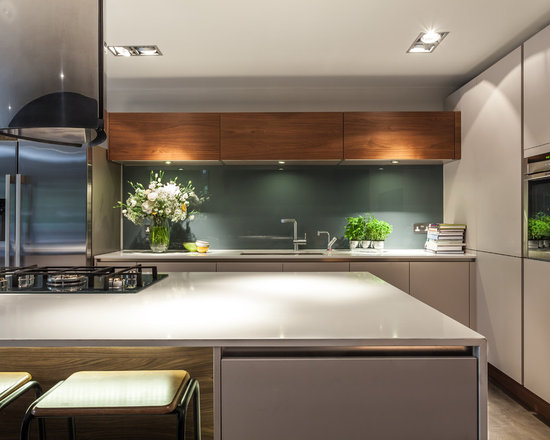
- Glass splashback is included in the impression package, but lowest range with normal glasses. White colour glass looks like minty blue rather than white. It cost about $800 to upgrade to better glass, where white looks white.. and more $ for metallic finish, which looks super cool. But we are happy with the standard grey colours and it matches rest of the home.  Hope it will look as nice as this, which the kitchen is finished.


That's pretty much it for the kitchen.